

Cách ẩn file trong Windows 7:
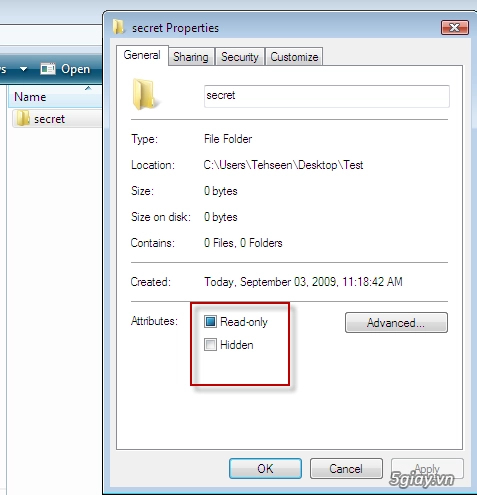
Ví dụ: Bạn tạo 1 tập tin có tên là secret bên trong 1 folder có tên là Test. Để ẩn folder secret đi, bạn nhấn chuột phải lên nó ~> chọn Properties ~> chọn Hidden ở phần Attributes:
Để hiển thị folder secret ở trên, bạn vào folder Test, click Organize ~> Folder and Search Options từ menu:

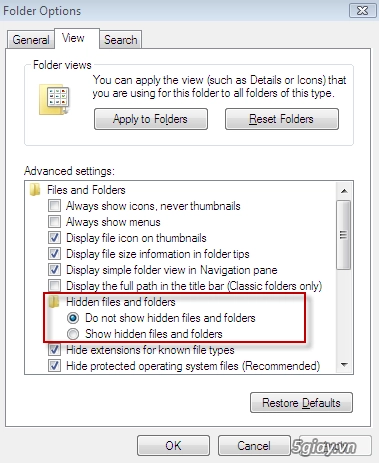
Chú ý: những thiết lập này có tác dụng đối với tất cả các file hay folder trên ổ cứng của bạn.
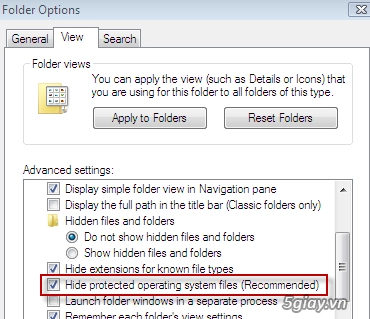
Để hiện cả các file được hệ thống bảo vệ (Protected Operating System Files), bạn bỏ chọn ở ô trước dòng chữ Hide Protected Operating System Files (Recommended):
Có thể bạn quan tâm: